Airshow Photography Tips
The Equipment |
The only special piece of equipment required for airshow photography is a long lens. You don't need an auto-focus camera and you don't need image stabilization or vibration reduction, but if you can't fill the frame with the aircraft then your photos will lack impact. If you're using a 35mm camera system then I'd suggest a lens with focal length of 300mm as a good starting point. At the other end of the scale, there's only limited value in going over 500 or 600mm, because haze will wreck any photo you take from a great distance, and there often isn't enough light to allow you to use the fast shutter speeds required by such lenses. The speed of the lens can also be important, and you should certainly try to get a lens no slower than f5.6. If the sky is overcast then a fast lens with an aperture of f2.8 will get shots that will be missed by a slower amateur or "prosumer" lens, rated at f4 or f5.6. However, these fast lenses cost an enormous amount of money and they're large and heavy, which makes them difficult to handle for the 4 or 5 hours that an airshow can last. A tripod or monopod can help, but the presence of a crowd of people makes a tripod impractical, and even a monopod makes it very difficult to pan with a fast moving aircraft. A zoom lens will let you capture a variety of action, from small aircraft to groups of aircraft flying together, however it's much more difficult for a manufacturer to design a zoom lens which produces photos as sharp as a prime lens, so prime lenses tend to be sharper than zooms. |
Getting the Exposure Right
The easiest mistake to make when photographing an airshow is to underexpose your photos. This happens when you allow your camera to choose all of the exposure settings. Since planes are up in the sky, and the sky is very bright, the camera will choose an aperture which is too small, or a shutter speed which is too fast, and you end up with the sky properly exposed and the aircraft underexposed. There are several solutions to this problem: (1) Put the camera into spot metering mode so it takes more account of the aircraft and less of the sky. Theoretically this is a very good solution, but in practice it's often impossible to keep the center of the frame exactly on an aircraft, because it moves around so quickly. Often you don't even want the subject in the center of the frame - if two aircraft are flying in formation then the center of the frame might be empty sky, so you're back to the original problem where the camera is exposing the photo for the sky. Using spot metering also doesn't work too well if the aircraft has a color scheme with contrasting light and dark areas. (2) Put the camera into full manual mode, where you set both the shutter speed and the aperture. After you've set the shutter speed (see selecting the best shutter speed, below), you can then determine the appropriate aperture by pointing the camera at something of about the same darkness or brightness as the plane you want to photograph. Green grass is usually the equivalent of "18% grey" the industry standard "correct" exposure, so point the camera at the grass and use your camera's built-in light meter to adjust the aperture until the camera says you're at the right setting. There are several problems with using full manual mode. On a day with scattered clouds the light changes frequently, depending on whether the subject is in a sunny spot or a shady spot; when the subject is a fast-moving aircraft, this problem is especially bad. If you don't point towards grass which is in the same direction as the planes you're photographing, then the sun will be striking the grass and the planes from different angles, and so the aperture won't be correct for both of them. Even on a cloudless day the light changes through the course of the day, so you need to recalibrate your aperture periodically, however even this won't help completely, because the amount of light changes significantly as you pan with the aircraft from one part of the sky to another. Some planes are darker than grass and some are brighter, so you'll have to adjust your settings from plane to plane. Since the shutter speed you use probably depends on whether the subject is a jet or a propeller driven plane, you'll also need to make adjustments for that. (3) Put the camera into shutter priority mode, where you set the shutter speed and the camera selects the aperture. If you take this approach then you also need to use exposure compensation, otherwise you're no better off than when you started. Exposure compensation means telling the camera to let more light in than it normally would, or less light than it normally would. To cure the problem of underexposed aircraft, we need to tell the camera to let more light in than normal. Usually this means telling the camera to compensate by "+1 stop", which means allowing in twice the amount of light that the camera would otherwise have chosen (if you're not familiar with these concepts then read a description of aperture stops). If the aircraft you're photographing is white or silver then you might need to dial in minus half a stop of exposure compensation, but if it's very dark then you might want to add one and a half stops. Don't compensate much more than this, because you don't want a black plane and a silver plane to both turn out 18% grey - the black plane should look dark and the silver plane should look bright! |
Selecting the Best Shutter SpeedSeveral factors affect the shutter speed you should choose, but by far the main issue is the focal length of the lens. The rule of thumb is that the minimum shutter speed you should use is the inverse of the focal length, so if you're using a 500mm lens then you should use a shutter speed of 1/500th of a second, or higher. However, other factors also affect the shutter speed that you should use. If you're photographing propeller-driven aircraft then you shouldn't use a shutter speed which "freezes" the propeller, since it's very unnatural to have a plane which is flying, but whose propellers don't seem to be turning. In practice, this means you shouldn't use a shutter speed faster than 1/500th of a second. If you're photographing a fast moving jet then a shutter speed of 1/1000th of a second will help to eliminate blurriness caused by hand shake. However, all other things being equal, increasing the shutter speed simultaneously increases your aperture, resulting in blurriness because of decreased depth of field, so increasing the shutter speed isn't a perfect solution. If it's windy then you might want to use a slightly faster shutter speed than usual, since a strong wind affects your ability to pan smoothly with the plane. |
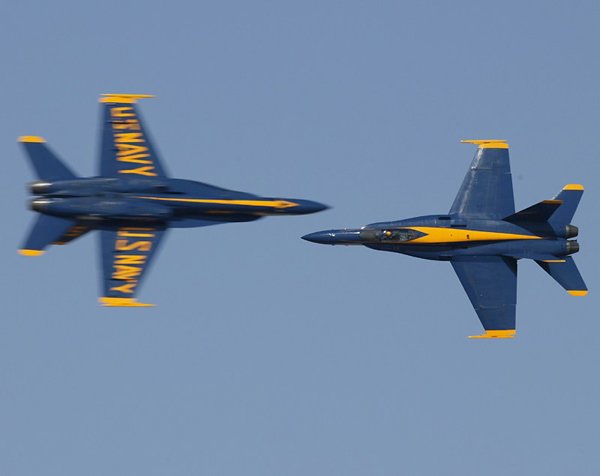
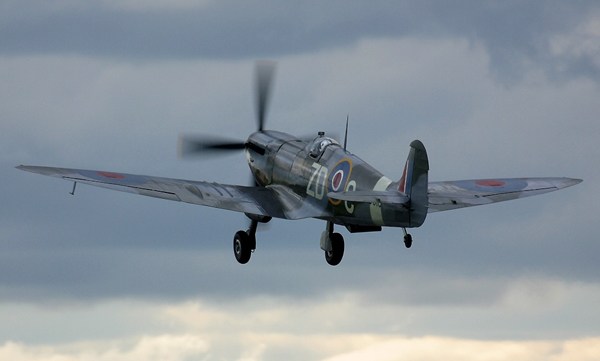
CompositionThere's a lot of stuff to learn when doing aviation photography before even getting into the issues of composition which separate a technically perfect but boring photo from one which leaps out from the page and grabs the viewer by the throat. One of the main factors determining how much impact a photo has is the angle of the aircraft to you. One of the most dynamic views comes when the plane is banking towards you, showing off its top side and its pilot. Another inherently interesting viewpoint is when the plane is pretty much heading straight towards you, but such views are not common, since airshow safety rules normally dictate that the aircraft be moving parallel to or away from the crowd. This photo illustrates another basic principle - frame the shot so that there's plenty of space in front of the plane, so it appears to have room to move forward. Usually you'd put more space in front of the plane than behind, but this isn't as important as allowing plenty of space in front of the aircraft. |
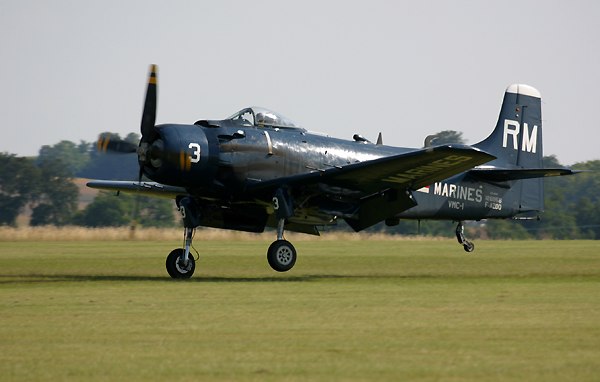
Another shot which carries a lot of punch is when the plane is taking off or landing. As usual, it's much better if you take the photo when the plane is facing towards you, rather than away. The trick here is that you often won't get these photos if you're at the designated "show center", usually half-way along the runway. The planes take off and land from either end of the runway, so that's where you need to place yourself. Another advantage of being at the end of the runway is that the planes often bank just before landing or after taking off, which produces a more interesting photo. |
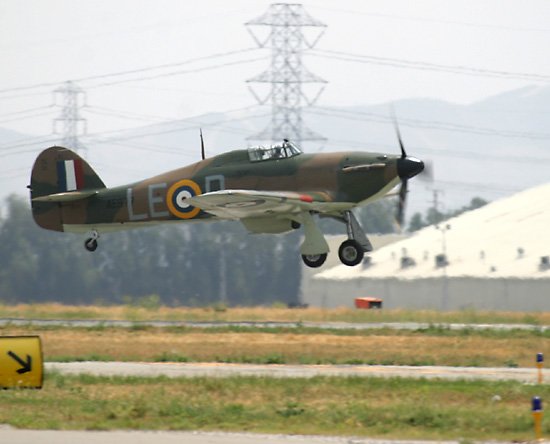
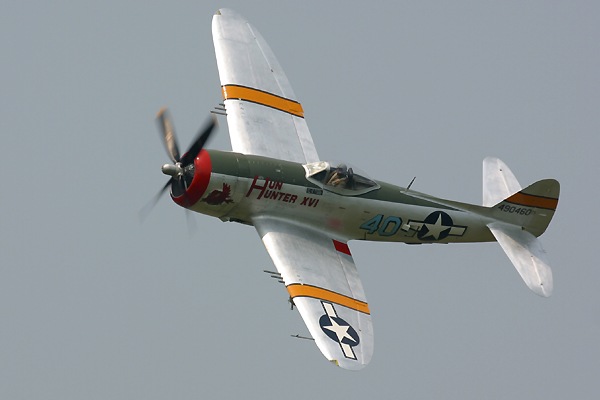
As with any other type of photography, it's very important to avoid distracting elements in the background, like the power lines in this photo. As a matter of fact, this shot has distracting elements both in the foreground and the background! The best solutions to this problem are to choose a shooting location without distractions in the background, and to time your photos so the plane is in a clear area when you press the trigger. |
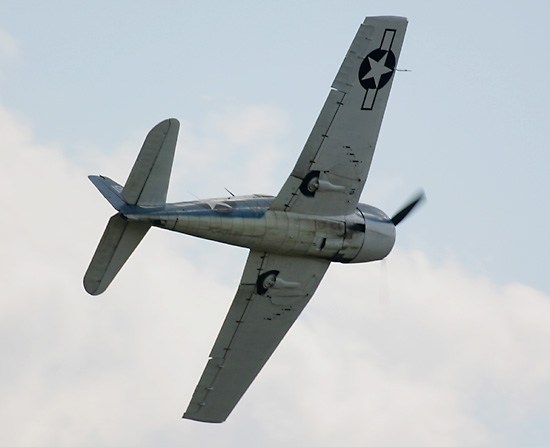
By far the best way to waste shots is to shoot the plane as it's flying away from you - such shots somehow don't appeal. Another major mistake is to take a photo of the plane with the cockpit not visible. Photos of the bottom of a plane aren't usually very exciting either, unless there's something particularly interesting there, like an open bomb bay door, weaponry or such like. Since so many airshow photos are of flying planes, the sky is a very important element of the photo. Just as in landscape photography, dull overcast skies can wreck what would otherwise be a very good photo, and a blue sky with fluffy white clouds can be very appealing in airshow photos. It's natural to assume that a polarizing filter would be useful, however polarizing filters block two stops of light, and if you're using a non-professional lens at high shutter speeds, there usually isn't enough light to allow them to be used. As usual, it's best if the sun is behind you when you take photos, but you usually don't get much choice, since all the action is happening along a long, straight runway. If the sun is in front of you, then you should change your position to the end of the runway nearest the sun. Since most airshows are held in summer, and during the part of the day when the sun is at its brightest, it's very likely that contrast will be high, with deep shadows and possibly blown-out highlights. If you're shooting with a digital camera then using "raw" mode rather than "JPEG" mode will give you more latitude to bring out the shadow detail and also prevent blown-out highlights. |
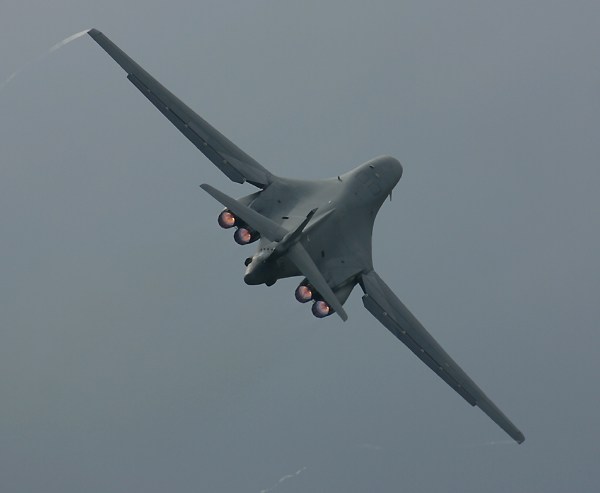
For every rule there's an appropriate time to break the rule. You can often break the "don't shoot from behind" rule when the plane is employing afterburners, as with the B-1 bomber near the bottom of this page. And sometimes a photo from very near a six o'clock angle can be incredibly atmospheric, particularly if the sun is in front of the aircraft and on the same side as you are. |
Difficult Shooting Conditions |
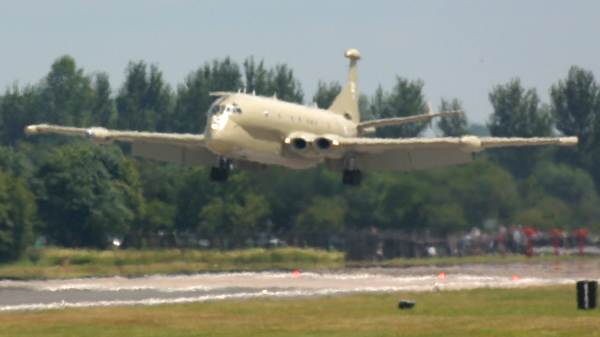
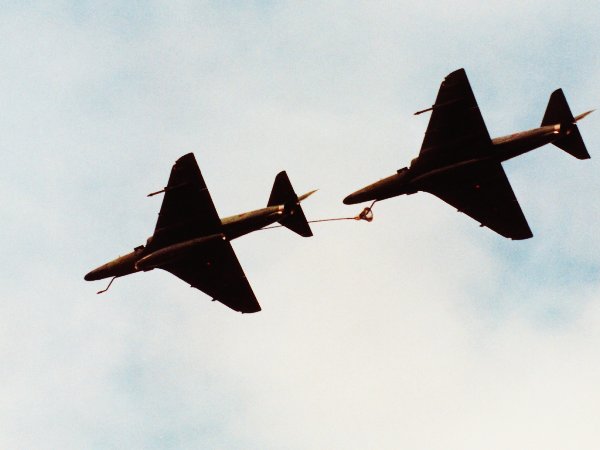
You might think that rain is the worst thing that can happen when you're photographing an airshow, but there's another hazard which is at least as likely to wreck your photos: haze. Common sources of haze are heat, humidity and air pollution, and another particular problem at airshows is heat haze caused by heat waves rising off the tarmac, as in this photograph of an RAF Nimrod patrol aircraft. |
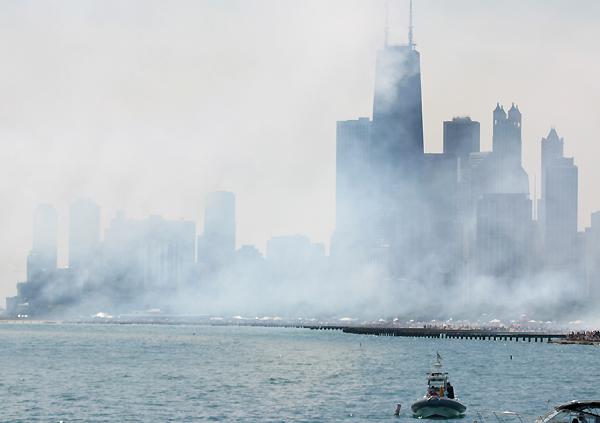
Another form of haze is entirely preventable but often present: smoke trails deliberately created by displaying aircraft can sometimes fill the air with so much smoke that your photos are completely ruined. I missed some beautiful photographs of B-1 bombers passing in front of the buildings of downtown Chicago, because a biplane display team which flew immediately before the B-1s pumped out enough smoke to obscure the entire skyline! The smoke was so bad that I didn't even attempt to take the shot, because I knew there was no way to rescue it. Ironically, this smoke frequently wrecks the display of the very planes which are making the smoke. I can understand performers using smoke in certain circumstances, but it seems to be vastly overused, often even by solo warbirds doing straight flypasts. Aerobatic planes probably benefit from smoke trails, but what's the point of solo warbirds doing it, unless the display is meant to simulate combat? |
Bad weather is certainly a problem but once again there are always exceptions to prove the rule, and you need not always despair if the sky is dark rather than sunny. Dark skies can make getting a good exposure difficult, but sometimes it can also add a very dramatic element to your photos. After all, military aircraft are fundamentally instruments of destruction, and a dark, foreboding sky can portray this aspect of their nature. |